Tagged: JDM

EP3 update.
Breaking news: Money does grow on trees! (As proved by Kyle and his latest round of spending)
I joke of course. He works hard for all these new toys and it’s really paying off. The last bit of work I did on the car was fitting the coilovers, but even then I knew at least one new thing was on the way. First came a set of Rota Grids. Some of those deep, wide ones that really give the car a strong stance. Unfortunately they rubbed so the arches were rolled and the car raised slightly but now she’s sitting pretty.
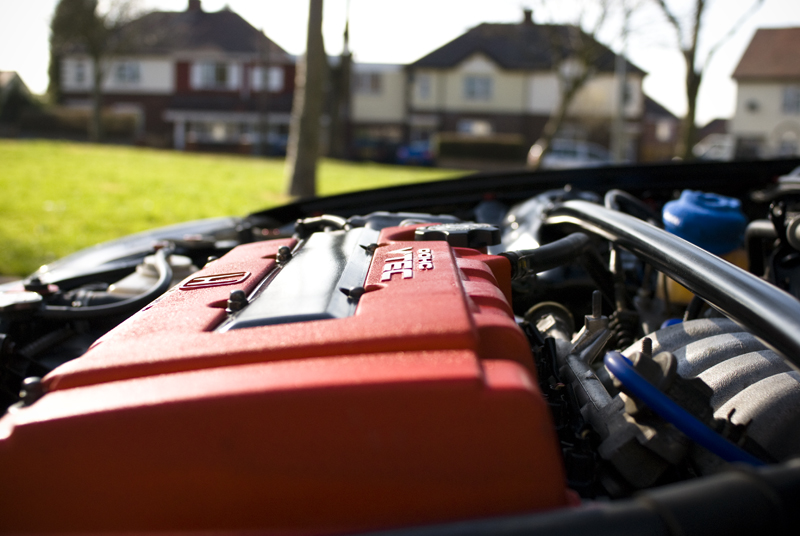
Then came the turbo kit. He’d been talking about it but I didn’t actually realise it was going to happen so soon. The car spent a good amount of time with TDi North having a turbo kit installed, all the tuning done and a few other bits and bobs to help him along the way. An MFactory LSD has been installed to help manage the power. I’ll be honest, the amount of time the car was at TDi for was, for me, too long. It went on for weeks due to one thing or another (being short staffed and not having the parts ordered I believe). However, the end result is pretty damn awesome. The kit looks extremely well put together and any niggle or question that Kyle has found bothering him seems to have been answered fully. The kit, has boosted the EP3’s performance to 360bhp (Correct me if I’m wrong Kyle?) which is “boost by gear” but there is also a special button which can raise the power output to 400bhp. A tidy figure!
I actually thought he was done spending there, but this week the car has been away once more. It’s spent a week at Knight Racer Ltd, having a Mugen grill and front lip / splitter fitted. The lip has even been smoothed, or sealed into the bumper so you can’t see any join between the two parts. Paint match is 95% but the quality looks spot on.
As far as I know, that’s the lot for now, so today I grabbed some photos.


No videos just yet, I need to get the lift bolt changed in my Corolla before I go chasing after a boosted EP3. In a couple of weeks we’ll see how it fairs on the quarter mile strip too.
Oh, and here’s one shot of the ‘rolla.


Bank Holidays, Pizza, Sunshine and Exhausts
I love bank holidays, especially the two bank holidays around Easter. I get the chance to catch up on any jobs that have always “slipped” my mind or, like today, I get the chance to sit out in the sun all day, crawl around under a car, swear a lot at seized bolts and eat pizza.


Today I spent the day helping Kyle swap the entire exhaust system on his new EP3. (I say new… I think he’s had it for around a year now?) “No drama”, I thought, “The exhaust system will get done in no time, it’s just the manifold I’m not 100% sure on”. I took those words back almost straight away. As soon as I got the car in the air and had a look around the standard system I saw we were going to have a fight on our hands. Some of the bolts looked more like blobs of dirt than a lump of useful metal. Thinking cap on, I broke out the PlusGas, wire brushes and chisels to clean up the bolts as much as possible. It didn’t really work…
I attacked the back box while Kyle dealt with the manifold end. At my end, there was only two bolts and two rubbers. EASY. No. When I ran the wire brush over the bolt head and threads to clean them up I saw that half the threads just fell off. The heads weren’t much better either, both had to be chiseled free from their rusty case so that the socket could stand a chance of being hammered on. It was a good fit, a six sided socket for a six sided nut. It wasn’t going to round the head and it didn’t. The first bolt snapped and the second had to be cut free. Two bolts out, zero survivors. Luckily some new bolts were sent with the new system! Even the rubbers put up a fight but that was mainly down to me trying to cut a corner. I could have taken the bumper off to start with and have complete access to the rubber mounts but instead I tried to fight, one handed with a stiff rubber mount I couldn’t really see. That didn’t work and eventually I had to spend 60 seconds removing four bolts, two screws and one plug to remove the bumper, slide off the mounts and free the old backbox. Lesson learnt. Don’t try to be a hero.


And Kyle’s end things weren’t going much smoother. The two bolts holding the centre section to the manifold were stuck solid and he was having to fight the bolts with a hacksaw blade to free them. The blade won the battle eventually but that meant we still didn’t have a survivor in terms of bolts. Up top things got a little better. The manifold cover came off relatively easily. Two bolts came out with little effort once I’d got a proper socket on them and a breakers bar but the last one, well, let’s just say the shield some how managed to work its way around that bolt… All that was really left now were five bolts holding the manifold to the head and with the help of a proper six sided socket they all came undone without any bother.
So the back was now free, the front was free, it was just the middle left to go. Really all we needed to remove was the rubber mount at each end and unplug the O2 sensors and it would drop down and slide out. Glossing over the fact that even those pesky plugs put up a fight we had the whole system stripped before the pizza arrived. Pizza, pizza, pizza. Thank you Dominos. (Pepperoni, thin and crispy before anyone asks).


Back to work, bellies full, the last thing to really free from the car was the manifold. In standard form it’s not very big at all but with it being at the back of the engine on the EP3, it’s in a really awkward place. Kyle had read that it may be necessary to remove the subframe but I wasn’t going to fight with that. Once we’d removed all the bolts from the head mountings and fought with the support bracket I could see that it was possible to remove it without taking the subframe apart. I had to remove a heat shield and a guard for the driveshaft but with some careful planning, spinning and maneuvering the manifold was free. Cheers all round, we were now on the home straight!

Taking a second to compare the two systems it’s easy to see a big difference. Rust and age aside, the OEM system is small, oddly shaped and well, it seemed quit restrictive. I didn’t like the look of the bends in the system at all. They aren’t smooth, they aren’t consistent. Some parts of the system, in the bends were compressed and were clearly causing restrictions. The new DC Sports system however, apart from being a slightly bigger diameter (60mm internal) was actually that size the entire length. The bends are beautifully crafted and not one restricts the size of the pipe or airflow. Having no catalytic converter in the system helps out too but it will ping an error code for the second O2 sensor…

Anyway onto the fitting. Manifold first and straight away a “problem”. The OEM manifold was tiny and allowed us to rotate it to work it loose. The DC Sports manifold incorporates part of the exhaust system into it to make it a better flowing 4-2-1 design, however this meant we had more manifold to get in the way and try as we might, it wasn’t going back in. There was a simple solution though and that was to unbolt the anti roll bar D brackets, remove the bushes and lift the anti roll bar up slightly to give more clearance. It worked a treat and the manifold went straight in.


The back box was simple as well. A bit of lubricant on the rubber hangers and it was slid into place. With just the centre section left to do we were feeling confident. I bolted together the two sections, slid under the car and offered it up to the manifold. The bolts that are supplied with the exhaust system are only just long enough to go through both flanges, the gasket and the nut. There’s nothing spare past the end of the nut once it’s done up tight. This might not have been an issue but combined with the zero play in the bolt holes meant it was an absolute pain to get it all attached. 10mm bolts, in a 10mm hole, zero play and a gasket that seemed slightly out of shape managed to rework the frustration back to the surface. We ended up fitting the backbox end first before going back to the manifold end and using slightly smaller (and longer) bolts to secure the joint. The supplied gear just didn’t work for us.


Done. Well almost. I’d been soaking the O2 sensors in the old system with plus gas since removing the old gear. I hate O2 sensors with a passion. They always seem to be super tight, seized and only accessible to an open ended spanner which encourages rounding. You can buy specialist sockets for them (to feed the cable through) but I don’t have one. I only have my trusty 22mm spanner and the hope that PlusGas really will do what it says. The car gods must have been with us today because they came undone with barely any effort. Not one wiff of a rounded corner or seized thread. A quick crack with the spanner and they came out by hand. They fit perfectly back into the DC Sports manifold but you do have to add some loom extensions to them (which are supplied).
Everything done. Everything sealed. Bung removed from the back box for extra VTECs. Kyle started her up and after a quick once over I didn’t find any exhaust gases leaking from the joints so we dropped her down, tidied up and headed out for a bit of filming. The filming will come soon once I’ve ended it all but once again I’ve done a before and after comparison, as well as a few drive by videos using my car as the camera car. GoPros are awesome.
So that’s what we got up to today. Shitty bolts aside it was a good day and it was nice to put some good hours into working on a car again. I ope Kyle enjoys the new ASBO cannon on his car and I hope you enjoyed this post. Look out for the videos soon!


#ThrowbackThursday
For this Throwback Thursday I’m not going back too far, in fact, I’m only going back to my last car. I made the tough choice to give it up and buy a “sensible” car back in January but I regret it so much. It’s my favourite car and like someone said in the video I posted yesterday, from looking at the car many people weren’t aware of how much work I put into it. There was so much work going on that I’m going to have to split this into two or more posts. So here’s the story behind me pride and joy;
Back in early 2010 I was getting a bit bored of the Audi A3 I owned. It was a nice car but it just didn’t feel like my car. I made a choice to sell it and get another Civic and after a quick search ended up buying another Frost White EG. I’d owned two 1.5 LSi’s before so this time I wanted a step up. The VTi would have been a killer on insurance so the only other choice was a 1.6 ESi. The one I found was an early spec, an early 1992 model. It came with all the electrics and even the optional air conditioning system. The bodywork didn’t look too bad but it had the awful grey interior. For £820 it seemed like a good buy.
The original plan for it was to keep it to a OEM standard. Find all the optional extras I could, keep it comfy and enjoy it. I wasn’t planning on doing anything crazy with it. The brakes would be upgraded to VTi spec, and the suspension would be rebushed but that’s about as far as I planned to go… and I stuck to that plan… for about a year.
The first thing I did when I got the car was visit a local scrapyard to scavenge for parts. I was in luck as I came across two late spec EGs with black interiors. It came me a chance to get rid of the elephant skin grey interior mine came with. In two trips I managed to pick up the entire collection of interior plastics, carpet and seatbelts. The only thing I was missing were the seats. The ones in the scrapyard were ruined, I couldn’t use them, and I didn’t want to shell out for a full Recaro Integra Type R interior. I found another option though. The Integra Si had the perfect seats for the interior in my car and the front seats bolted straight in. The rear seats were a bit more challenging to fit but I ended up stretching the Si fabric over my original seats foam base and the job was done. I had pretty quickly put together a comfy interior for next to nothing.


While all that interior assembly was going on I had managed to fit an alarm system myself and wire up the front and rear light conversions that come hand in hand with owning a UK Honda. The alarm was a bit of a challenge to install. It took hours of research and labelling to find the right wires but my patience paid off and it worked without any issues. The lights; simple. UK Civic’s are made slightly different to those in Japan, only the outer rear clusters light up on our car so with a bit of tinkering you can convert the clusters to the full width “JDM” lights. The front’s can be converted to a US style too, by wiring up the indicators to function both as sidelights and their intended use. They’re both small jobs but really add to the style of the car.


Next on the job list was to remove the air conditioning system and power steering. The AC didn’t work and it’s just a personal preference of mine to remove the PAS. The AC was an easy job, I just had to follow the parts back from the front of the engine bay to the firewall removing the bolts as I went. Inside the car I removed the AC condenser and replaced it with the standard channel that non AC cars have. A dead simple job. I could have always got it recharged but I didn’t feel the need for it, plus it was a way of removing weight and strain from the engine. Removing the PAS is a bit more a job with the engine in place. It’s all straight forward when you’re unbolting everything from the front of the engine but the lines loop behind the engine and steering rack so getting at them is pretty awkward. Once all the lines were free I used a bit of the spare pipe to loop the outlets on the rack and that was that. Even less strain on the engine and more road feedback.
With the simple jobs out of the way I started on the suspension and brakes. My car came with shockingly bad, tiny, 242mm front and rear discs brakes. The pads were cheap and worn and stopping felt like a game of chance. Keeping with the OEM theme I decided to buy a set of VTi hubs. They’re only slightly bigger front brakes (262mm) and the rears are exactly the same but I didn’t have the need for anything bigger. It was a lot of work using a grinder to take all the hubs back to bare metal so they could be repainted but it was worth it. I wanted everything to be brand new underneath so I even bought new bearings and balljoints for all the hubs. The calipers were stripped too, a job I’d never done before. It was pretty tricky to do the rears but the fronts were easy, or so I thought. It turned out I’d actually been sold the wrong calipers with the hubs so after refurbishing them they wouldn’t fit. I ended up having to shell out an outrageous amount of money to buy brand new calipers for the whole car. I guess it was worth it for piece of mind though. It wasn’t only the hubs that were treated to new parts. I removed all the front suspension too, burning out the bushes and replacing them with brand new Energy Suspension bushes. The rear control arms were replaced with a pair of brand new Function 7 control arms. The re-bush was complete.


Fitting all the new gear went relatively well. The front control arms, anti roll bars and track rod ends went right on, no problem at all. The hubs and brakes went on fairly easily too. I had to do all the work at my Dad’s house on his sloping drive. The front brakes were simple to change, even cracking the hub nut was fairly straight forward. The rear brakes were a pain though. After getting the rear of the car in the air I realised the old handbrake cables were rusted into the calipers completely. There wasn’t any way we could have got them off. It wasn’t something I’d for so when we had to cut the hand brake cable off, it left me in an awkward situation. I had nothing to stop the car rolling away. The shops weren’t able to get the parts in till the week after either so for those few days, I was car less. With the handbrake cables cut I could switch the rear arms over and continue fitting the new brakes. I’d also decided to upgrade the rubber hoses to braided lines and swap out the master cylinder and servo for a larger DC2 model. Bleeding the brakes went well so finally I had some good brakes but before I’d even got the car off the drive the lack of hand brake cable came back to bite me. When lowering the car to the ground, an axle stand tipped and the car missed the wheel blocks. It ended up rolling a couple of meters down the drive before the wing caught on a wall and stopped the car. Fitting new brakes was awesome but having the car roll into a wall took the shine off the good job…


After getting all that out of the way I was planning on just enjoying the car. I’d bought a roof rack to carry my snowboard and bike and I was starting to collect some exterior optional extras. A set of wind deflectors was one of my first buys, followed by a JDM tailgate and rear wiper delete. Nothing to add performance but little things to add a bit of style to the car (ignoring the fact that the tailgate was red). One of my favourite buys was a set of Genuine Stanley fog lights. These things are rare as rocking horse shit and I’d managed to bag a set. They needed a bit of work, the loom was incomplete and the brackets were pretty rusty but after a little research and a bit of rewiring they were working. I wanted them on the car so much I braved the fresh snow to fit them, loosing most of the sensation in my hands but it was worth it. I’d used eBay replicas on my old Civic but they were useless. These OEM foglights were in a whole other league. They worked perfectly and actually lit up the road so if you want foglights for your Civic… hold out for a OEM set! And this is pretty much how the car stayed for a while. I bought a set of EK4 “Jordan” wheels and that was that. I drove the car and enjoyed it.


Until I noticed how sick the engine seemed… I was becoming aware of how much white smoke it would puff out the back and how underpowered it felt. I would have to drop a gear or two on the motorway to make it up a relatively steep hill maintaining the speed limit. Something had to be done about it. I could have spent the time and effort rebuilding the engine but after a bit of thought I decided there was only one way to go; B Series. One morning I got up early and headed down south to meet Stew. He had a conversion for sale but also offered to give me a hand fitting it as I didn’t really have anywhere to do the job. Being a mechanic he had access to all the tools and a lift so within a couple of hours the old engine was out and the new heart in. I had my first B Series. A B16A2 that was complete with a lightweight Fidanza flywheel and a stainless 4-2-1 manifold. It felt great. A healthy engine, more power but suddenly I was forming new plans…. Bigger plans… More expensive plans


EK4 In The Sun
Another sunny weekend! Yay! Hours of fun on the bike and this quick shoot. You might remember I helped Kyle with a wire tuck a month or so back (here). Since then not much has changed; the wheels have been dipped by WrapStarz and a new steering wheel has been fitted but the big changes are coming soon so before those changes happen I asked if he wanted some current photos.


I decided to choose a bit of a secluded location but I wasn’t entirely sure if the low EK4 would make it. The last time I drove down these lanes the roads were covered in mud, grass and other debris from the fields and I ended up half ploughing the road. Taking it steady in the EK4 we found the roads had cleared and the first spot was pretty easy to get to.


I’d managed to choose a spot with the sun almost directly behind though which made it a bit difficult. Light skies and a dark car are always going to be a bit awkward. I tried to shoot slightly under exposed off the car so it didn’t blow out the skies but a bit of recovery in Photoshop brought the detail back out. Talking of editing, I keep finding it’s a total gamble how my shots come out. I’m using a laptop so how the editing looks to me always seems to change on other people screens because of my screen angle. I think a desktop PC and dedicated screen is needed!


While I was snapping away I decided to try a see through bonnet style shot. I’d not got my tripod with my though so I attempted it by hand. One shot with the bonnet open and one with the bonnet closed and somehow they lined up almost 100%. I managed to merge them pretty well in Photoshop by laying the bonnet closed shot over the bonnet open and using the eraser tool to carefully (in one go) fade the bonnet. There may be other ways around this but I’m not aware of them I’m afraid. I think it turned out pretty well though!

With a decent amount of shots at this point I decided we should move on further down the road into the trees. Bit of a bad call on my part. As we were driving along slowly, there was a loud bang and scraping. What looked like a few puddles were actually some pretty deep pot holes and dropping down into them had torn off the Mugen style front lip. It hadn’t just ripped the mounting points off though, the impact had torn the lip in half and it’s meant to be an unbreakable poly material. Well that was the end of that shoot. We managed to tie up the half still on the car and drive back to get some tools to remove it. Dangers of having a really low car I guess!
If you’re wondering, here’s the specs:
Engine/Transmission
– B18C4 Engine
– Type R Valves, Springs, Retainers and Cams
– Baffled Sump
– Lightweight Flywheel
– 6 Paddle Clutch
– S80 Gearbox 4.7 FD
– ITR Shifter
– K&N Intake
– BuddyClub Spec 2 Exhaust
– Bee R Rev Limiter
– Magnecore HT Leads
Braking/Suspension
– ITR 5 Stud Hub/Brake Conversion
– HEL Braided Brake Hoses
– MeisterR Zeta R Coilovers
– Rota GT3 Alloys
– Toyo T1R Tyres
Exterior Styling
– EK9 Headlights
– Rear Tints
– SiR Grill
– Aerial Blank
– Team HEKO Wind Deflectors
– Number Plate Tilt Bracket
– Tegiwa Imports Engine Dress-Up
– Mugen Front Lip
– Spoon Reservoir Covers
– EK4 VTi-S Rear Lip
– KODE Rear Tow Hook
Interior Styling
– Nardi Steering Wheel
– Driftworks Snap Off Boss
And future plans include:
– EK9 Spoiler
– Skunk 2/ BLOX Inlet Manifold
– Skunk2 Rear LCAs
– ASR Brace
– Beaks Rear Tie Bar
– Turbo Kit
– Full Respray
– Recaro Seats
– Takata Harness’s

Project Track – Headlight Intake
Remember the headlight ducts I was making? Well here’s some progress for you. I was meant to post it up yesterday after getting all the work done on Monday evening but my Dremel’s battery died so I had to wait till yesterday evening to finish. Excuses I know but here’s how things went.
After I’d made the fibreglass molds I was left with a really rough shell to work with. The first job was to trim the shells so that they would fit up to the OEM backing. Luckily I’d got an imprint left in the mold to show where I needed to cut so I just followed that line, checking the fitment bit by bit and carefully got the shape I needed. It’s pretty easy to do with a Dremel so if anyone is going to give this a go make sure you’ve got one handy!


When I was happy with the shape and fitment it was time to bond the two halves together. I chose to use Tiger Seal. I’ve bonded a sunroof bung in with this before and it’s amazingly tough. It’s weatherproof and sticks like nothing else. If you get it on your clothes, it won’t be coming off. I ran a bead around the backing and around the fibreglass shell and pressed them together. It held instantly so I went round the edge and added a little more to get a complete seal.


The next thing on the list to do was make the hole and channel for the air intake. The exit hole in the OEM backing is 60mm wide and I figured I wanted to make the intake in the fibreglass 80mm but I had a can of baked beans to hand which was 70mm so used that as a template. Drawing round the can and then very carefully and slowly cutting round the marks I was left with my intake. – Skipping a bit now. Now I’ve finished the fibreglass work I’m thinking of redesigning this part increasing the size for a second version –


With the two holes in the unit done I needed a way of joining them to make a channel. I had a think and chose to use some aluminium mesh to make the shape. It’s usually used in bodywork repair to bridge gaps. The mesh is lightweight, easy to cut and easy to manipulate but it would also give a great base for some more fibreglass to stick to. It took a bit of fiddling to get it in place but it worked and I secured it in place with some fast setting Araldite. There was only one thing to do now and that was to apply some more fibreglass to the channel. Due to the channel being quite small and deep it was pretty awkward but I found if I soaked each strip in the resin first and then used an ice lolly stick to apply the strip then I could avoid pulling all the strips above that off. I’ve left it all to set now so for now the headlight duct is done.


I’ll finish it off by tidying up any rough edges and spraying the fibreglass but I won’t be smoothing it off with any filler to keep it as light as possible. I’ve already got any idea for a second version floating around in my head so I’ll give that a go once I’m completely happy with this. Hopefully the 60/70mm intake will work nicely. A standard B16A2 Throttle Body is 60mm and a standard B18C Throttle Body is 62mm so I think the headlight duct size should be ok for now.

Project Track – Headlight Modifications
Here’s something else I’ve been working on for “Project Track”; a pair of custom headlights. I aim to incorporate an air intake and shed a bit of weight. They will be replacing the standard headlights which weigh in at 1.9 kilograms a piece. Of course there are some of these headlight modifications already on the market but I’m someone who likes to build things myself if I think it’s achievable. I have two pairs of headlights lying around so here’s what I’m going to do.
The standard headlights are held together with half a dozen metal clips and some strong glue/sealant to hold the lens in place. To split the lens from the housing I had to remove the metal clips carefully with a screwdriver and then heat up the headlights to soften the glue. The easiest way to do this I found was to bake the headlights in my oven on the lowest setting possible. It doesn’t take long and to save the plastic housing deforming I only put them in the oven for a minute at a time until I felt the glue was soft enough. It can be quite awkward to separate the two halves. The headlight will be hot, the plastic backing will be a bit softer and the glue/sealant is very strong. I had to take my time and carefully work from one corner prising the lens out with a screwdriver a bit at a time until enough of the lens was free that allowed me to get my fingers underneath and pull the lens off completely.


When they were separated I was left with the two halves. The glass lens was going to be used to make a lightweight fibreglass mold to mount to the housing. Before I did that I decided to strip some weight out of the housing. Inside the plastic housing there is a large reflector and the device that holds the bulbs in place. It’s only held in place with 3 bolts but I did find it quite awkward. It turned out I had to keep the pressure on the reflector, levering it off, as I undid the bolts. Eventually it came off and left me with a nice lightweight housing. The hole left in the housing, originally for switching the headlight bulbs, is the perfect size for an air intake which will make things a little easier.


The next job was to make the fibreglass mold to replace the glass lens. I decided to use the les itself to make the mold so I didn’t have to make everything from scratch. First I covered the lens in some petroleum jelly and then a layer of cling film which made sure the fibreglass resin wasn’t going to stick to the glass. I then started to layer on the fibreglass mat and cover it with the resin, only a thin layer though. I want to keep it as light as possible so this first stage used only enough matting and resign to cover the lens and form the right shape. Once it was dry it was easy to separate the mold from the lens and it start the next stage…


That is where I’m up to at the moment. I need to trim the fibreglass down to size and then decide where I want to put the air duct in the drivers side unit. I’ll be looking to get them finished at the weekend and if all goes to plan I’ll make another set for someone else. Stay tuned.

Project Track – Suspension Stripped
Bank Holiday weekend, sun shining… Time to make a start on the new build.
A month or so back I’d picked up a set of hubs and shocks for peanuts. The petrol to and from the place probably cost me more than the parts. I ended up with everything for the rear suspension and almost everything for the front. Everything came off a 96 Spec JDM Integra Type R, while not exactly what I wanted, I thought it would be a good investment. First thing I had to do was strip everything down as I wanted to get it all powdercoated before reassmbling, despite everything looking in really good condition for parts that are over 15 years old.

- 96 Spec JDM ITR Front Hubs & Calipers (262mm Discs, 4×114 Stud Pattern)
- 96 Spec JDM ITR Rear Trailing Arms (240mm Discs, 4×114 Stud Pattern)
- JDM Spec Rear Lower Control Arms
- ITR Shocks (And a spare set of front shocks and springs)
- Front & Rear Upper Control Arms
- Rear Toe Arms
I started working on the rear hubs first as everything can be taken apart without the need of a press. The big rear trailing arm bush can be knocked out with a bit of force, hitting it from the rear. It’s tapered so it won’t budge if you try to knock it out the other way. The hub and bearing are in one piece on the rear, so it’s just a case of popping off the cap that covers the hub nut and then undoing the nut and the hub will slide off. Hub nuts are usually staked to lock them in place and most of the time you have to un-stake them but I managed to force it loose using a breakers bar. Once the hub was off it was just a case of unbolting the splash guard and removing the shaft mount the hub sits on. It was all pretty straight forward for the passenger side but I ran into an issue on the driver’s side where the Torx bolts on the back of the arm rounded off and will need drilling out. I’m going to try to do this after work tonight… my drill at home isn’t powerful enough.


I won’t be using the rear upper control arms so I binned them. Some sort of camber kit will take their place. The rear “toe” arms are staying though so I got to work on those. Without a press it’s very hard to remove the bushes. Sometimes you can use a vice and a couple of sockets to force it out but my favourite method is the blowtorch and hacksaw method. If you’re going to try this for yourself, make sure you wear some sort of respirator/dust mask! The rubber will give off some nasty fumes and smoke. The aim is to burn the bush enough to melt it slightly, and to heat up the metal so that it comes apart. I heat it up enough so that the rubber catches fire and I can knock the metal centre out of the bush. The rubber should come out too with a bit of effort, peeling away from the outer shell. That’s not the whole job though, the shell is still in the arm so this is where the hacksaw comes in to play. If you make one cut through the shell, trying not to cut into the arm, it will give the shell enough play and you’ll be able to knock it out. I used a small chisel and a hammer to knock it out bit by bit.


The rear lower control arms were the same. Burn out the bushes. Cut out the shell. I did notice on the rear arms that they look identical. I’m not 100% if this is how they should be though so I’m going to have to do a bit of investigating there.


Onto the fronts and there’s not much I can do. All I managed was to strip off any ABS wiring that had been left on, remove the upper control arms and put it all to one side. The splash guards can’t be removed without first removing the hub, and the hub can’t be removed without a press. I could have attempted to remove the ball joints but I thought I’d save some effort and leave that for the garage.


Once I’d removed the front upper control arms I binned those too. They’ll be replaced with a camber kit aswell. I did save the bushes though. I’ll need that section. The bushes will need to be removed and then the camber kit can be fitted to that section.

Caliper wise, I only had the fronts. Ideally I want to run NSX, Accord Twin Pots or Legend Twin Pots but after inspecting these calipers I’m in two minds. The ones from the hubs are almost as good as new. All carrier pins slide freely. All seals are intact. The pistons move and are almost completely rust free. They might be worth a gamble, but then again I could end up spending money on discs and pads to match and then cook them as soon as I get on track. A friend of mine used his 96 Spec Integra on track and cooked his brakes after a couple of laps..but maybe that was down to the pads… Smaller brakes would be less weight too.. It’s time to research I think. Either way, I still need to find some rear calipers.


The last thing was to check over the shocks. Integra Type R shocks will bolt onto an EG no problem and they sit around 15mm lower (or so I’ve read). The shocks I have look in great condition. No leaks and all still function. Once they’re teamed up with a good set of springs I think I’ll be happy with them. Spoon springs would be nice!


And that was that. You may have spotted another side project for the track car in the pictures. Something I’m custom making. I’ll do a write up of those when I’m finished.
Thanks for reading.

#ThrowbackThursday
Back to the D16A9 swap. I didn’t really go into it in the last #ThrowbackThursday and I’ll happily admit I want to do the swap again, even though I’ve now experienced the capabilities of a B Series engine.
It was 2007 when I chose to do the swap. I was 18 at the time and I wanted more power, but honestly, I can’t tell you why I chose this engine. I don’t remember my thought process. I could have gone for a B Series engine or even a D16Z6 but for some reason the D16A9 stood out to me. I think it helped I’d discovered this engine ran on OBD0 electrics, which would match my EG4s so in theory, it was plug and play. It doesn’t make a lot of sense to swap a high mileage, older engine into your car but it was worth a challenge.

The D16A9 can be found in a few cars. The 4th Gen (1988-91) CRX and Civic 1.6-16 models, the Honda Concerto 1.6-16 models and even a few Rovers. It’s a 1.6 Litre, Dual Over Head Cam engine without the “trademark” VTEC technology. It’s listed at around 130bhp so can be quite “nippy” in the right car. My 5th Gen (1991-95) Civic only had the D15B2 engine with a tiny 89bhp.

I had to do a lot of research before, during and after the swap. The forum I was part of at the time hadn’t really heard of the swap so I had to head over the pond for some advice. D-Series.org was a wealth of knowledge. They helped me with the basics of the swap and all the wiring. It wasn’t going to be such a plug and play job as I’d thought but I love a challenge.

I’d found someone selling an engine locally so headed over to pick it up. It came out of a 1988 Honda CRX 1.6 16 Valve, had 160,000 miles on the clock and hadn’t run for 2 years but I wasn’t put off. I was actually given a wealth of history with the engine which helped me later on… The D16A9 doesn’t use a Catalytic Converter to reduce emissions. At the time that engine was developed, it wasn’t such an issue, but my Civic came with a Catalytic Converter and had stricter emissions tests. I really struggled to get the car through its first MOT after fitting the new engine, even with the Catalytic Converter. Luckily there is a “loop hole” that states if you can prove the age of the engine, the emissions can be tested to the age of that and not the age of the car. That’s where the paperwork came in and saved me.

When the engine was home I began to clean up the years of grime on it and start building up the parts needed to start the swap. The engine was degreased twice, wire brushed clean and then sprayed with a very high temperature paint. The intake manifold and throttle body were removed, cleaned inside and out, sprayed and refitted. The gearbox got the same attention too.

Gearbox wise, I had to use a hydraulic box, to match my car. The D16A9 engine from the CRX was matched to cable actuated gearbox, my Civic used a Hydraulic box. At first I was worried I would have to swap to a cable gearbox but the guys over at D Series Org assured me that a hydraulic box could be used. I went for a gearbox from a Civic ESi, fitted with a D16Z6. If I’d had more money and the time to I would have rebuilt the gearbox with LSD and altered the gear ratios, but my budget wasn’t that big. One other thing with using the Hydraulic box was I had to use flywheel and clutch that matched the gearbox. I went for an Exedy clutch and a Fidanza lightweight flywheel to improve the responsiveness of the engine. The gear linkages and drive shafts were re-used from the cars original engine. They didn’t need to be changed.

Onto the mounts. When I fitted the engine I really didn’t know what would be what. Using a gearbox that matched my car I knew the drivers upper and rear engine mount would fit, as well as the drivers torque mount. But I had no idea about the passenger side. The passenger side torque mount wouldn’t bolt to the engine at all. The upper passenger mount didn’t fit either. My original mount wouldn’t bolt to the engine and the CRX mount was too small to fit into the engine bay position without being spaced. I eventually found out after trying different things that I had to use the mounting bracket from my original engine so that my original mount would fit and the engine would line up properly. That saved me a lot of hassle cutting off and welding mounting positions.

The wiring was the major issue. Before the swap, during the swap and after it was the most time consuming process. Before the swap I had to rewire an engine loom from my Civic so that it was compatible with the engine. I was given a wiring diagram by D Series Org and followed it to rewire the plugs and add the multi point injection wiring. I was also changing from a Single Over Head Cam engine to a Dual Over Head Cam engine so had to add a couple of new wires for the extra cam sensor. I’ve still got the wiring diagrams and they worked perfectly for the engine loom and the next part. You have to repin a few wires (and add some) at the ECU end. To repin a plug, just means to dis-assemble it and change the order of the wires. It wasn’t too hard to do. The biggest pain with the wiring came from the error codes and “hidden” sensors that weren’t mentioned. There were a couple of sensors I had source from another car and work out how to add them. They come from the bulkhead area and not the engine so they were a little hard to track down. But all was up and running within a month or so.

It was a fun swap to do, and a nice nippy engine for a 18 year old. While it wasn’t a simple plug and play swap it was interesting and taught me lots. Push the boundaries and try new things 😉

I do plan to do this swap again on “Project Track”. I haven’t seen the swap done before or since over here in the UK and I want to see if I can still do it. A lot of people will question why I don’t just put a newer, more powerful B Series in but I like a challenge. I want to rebuild the engine and gearbox and turbo charge it, all suited to a track car. All will be done on a low budget but it will be done!
Kyle’s B18C4 EK4 – Wire Tuck
This weekend was a busy one. I had a bit of a challenge on my hands after I’d been asked if I could wire tuck a friend’s Civic. I was confident I could get the job done but prior to this job I had never worked on an “EK” Civic. His EK wasn’t entirely different from the EG Civic I’m used to. Some bolts were in different locations and the wiring was laid out slightly differently, so it was a relatively stress free job.
For those of you that don’t know what a “wire tuck” is; You’re engine bay is full of wiring. It is normally ran down the sides of the bay, taking power to the headlights, sidelights, air conditioning and other accessories. Tucking these wires, is simply hiding them. It gives the engine bay a cleaner look and focuses the eye more on the engine than all the clutter around the edges. The one I did at the weekend was a basic tuck. We only hid the accessory wires. You can go further and hide the engine loom, power steering, air conditioning, battery and fuse box etc. Unfortunately this isn’t going to be a complete How To, but just an overview of what I got up to.
Saturday morning dawned and I was woken up by sun streaming through my window. It seemed Spring had finally arrived in the UK. After downing the essentials (Weetabix, Marmite on Toast & Coffee) I grabbed all my electrical gear and headed over to Kyle’s. When I arrived Kyle had already began stripping down the front end. To make this job possible, you have to remove nearly all the body panels from the front. In fact, everything except the bonnet. You also have to remove the battery, (it should be disconnected when doing anything electrical) and fusebox, so we whipped those out too. With the front garden full of body panels and the sun beating down it was time to start stripping the wiring back and cleaning it all up.

Kyle hasn’t owned the car long. He bought it as it stands now, so stripping the car back to this extent gave us an opportunity to see how well the car had been put together by the previous owner. Unfortunately, that person seems to have “bodged” a few things that we’ll have to get sorted. Ignoring the bodges, the previous owner also removed the ABS system which left all the orange plug dotted about the bay.
The accessory wiring loom is mostly separate from the engine loom which made the job a bit easier. The EK accessory loom runs from one shock tower, all around the front of the engine bay to the opposing shock tower. All of this wiring had to be unplugged, unbolted and unclipped from its original position. It was then a case of laying it out on the floor and seeing which wires we didn’t need. The ABS wiring was removed, and one section of loom for the front fog lights. That was the simple bit.
The “tricky” bit is the next job. You have to take the plugs from the accessory wiring that is left in the engine bay, unwrap all the insulation and try to feed those plugs back into the cabin area. It takes a long time, but you can’t just go hacking at the loom to try to get the insulated cover and tape off. If you end up cutting through a wire it just makes the job that little bit more difficult. It’s awkward too. On the inside, where you’re feeding the wires to, you have to remove panels from the dashboard, parts of the heater matrix and twist yourself into unnatural positions to see where the wires are coming through.

Bit by bit we managed it. The loom had to be cut open very carefully on the inside to free up just enough length so we wouldn’t have to extend any wires. After we went to all that trouble getting all the wires we needed inside, it was time to find a different route for them. The best route on a Civic is to feed it out of the hole created for the door wiring. It’s big enough to fit the large accessory plugs through and saves you having to make a hole, we just had to make sure the loom was protected enough from the metal edges of the hole and seal the bung up after we’d fed the wiring out.
We we’re on the home straight now though. All that needed to be done now was to feed the wiring around the inner wings, securing it with cable ties and making sure all plugs were covered and waterproof. I managed to route it just right so no wires needed to be extended. When I removed the wiring at the start I’d tried to keep as many as the OEM clips intact as possible so it was simply a case of pushing the clips back into a hole to secure the harness. Back in place and all connected up it was time to reconnect the battery and test all the electrics, all worked perfectly.

So after all that messing about with the wiring it was time to reassemble the car, putting all the body and interior back together and giving the engine bay a good clean. A nice long 7 hour day but the sun shone for the whole time and I didn’t get stressed once. A job well done I think.
I’m not sure what’s next for Kyle’s Civic but I’ll try to lend a hand when I can, and if anyone want’s a wire tuck doing, shout up and I’ll see if it can be done.


Project Track
Project Track. Well, there isn’t actually a car to represent this yet. But the goal… To have another play thing for Track Days and weekend blasts. Who knows. I may even build it to be competitive. I’m aiming to build this lighter, faster and more aggressive than the last project and I’m going to test my fabrication skills a bit more, by building more “custom” parts.
I’ll start by building up the suspension and brakes, maybe even the engine and then buy a shell to bolt it all to. I can’t leave my 5th Gen Civic background so it will be another Civic build. Follow here for loads of How To’s, Tip and tricks etc.
I have a couple of parts already that I’ve picked up to make a good base.
- 96 Spec Integra Type R 4×114 Hubs (Front & Rear)
- Integra Type R Shocks & Springs
- JDM Rear Lower Control Arms
I’m working on a few bodywork modifications too with the bits I’ve got left over so keep an eye out for those.
Anyway, the aim… 850KG and at least 200bhp.
Let the project commence 🙂
