Tagged: Corolla
The Corolla
She’s still ticking along nicely but I want to try something different. I’m going to try and document anything more I do in video form. It was fun making this little video and as much as I hate talking on it… I think it came out ok.
Toyota Corolla – GoPro WITH External Mic
Finally I can make some half decent car edits! Quite honestly, the GoPro in standard form is pretty much useless for recording on the outside of a car, unless of course you’re going to cover the edit with a song but then you don’t get the sweet sweet sound of your car. In standard form, even with a full case, completely sealed, you’ll get nothing but wind noise. Unfortunately the HD Hero doesn’t even offer any way around this but since getting the HD Hero 2 I’ve had the option for an external microphone.
An external microphone should be the way to solve the wind noise problem. It would let me place the camera anywhere on the car and run the microphone to whichever position I fancied (away from the wind!). Using an external mic does mean you need to buy a skeleton case or drill a hole in a spare one, so it’s not a good idea to use it in damp conditions. The Hero 2 uses a 3.5mm audio jack (apparently the new ones use a USB port?) so all I had to do was find a suitable microphone with that jack.
Google and YouTube have lots of suggestions. The first one to pop up was the Olympus ME15 and I was quite impressed. On the comparison video I saw it recorded the exhaust note really well with minimal wind noise and I was all set to buy it until I read it only had a meter long cable. These type of microphones are used my journalists and such to clip to their tie, or collar etc so a meter is plenty for that but I needed more.
I kept looking and found this video:
It had amazing sound quality and filmed purely with the GoPro I had a look into what microphone was used. It was a Hahnel MK100 which on Amazon has an RRP of £80 but can normally be picked up for a bit cheaper. I’d have loved to have bought this mic, but the price is well out of my range at the moment.
I kept looking, lots of videos posted with “GoPro HD Hero 2 External Microphone” don’t actually say what mic they’ve used which is a bit pointless but I eventually came across the Audio Technica ATR3350. It was the same price as the Olympus but with a super long cord. The sound quality appeared good too! A lot of comments seemed to pop up saying the major flaw was that the battery compartment didn’t have an LED to signal on or off. Those people were leaving the mic on (it is actually marked on and off by the switch), going out to film only to get back and have no audio. It’s not something I’m worried about. I’m quite competent at turning a switch from the on to the off position so that shouldn’t trouble me, but as a back up I’ll take my laptop to check footage on and a few spare batteries.
So that’s the mic I went for. It arrived yesterday but it was raining so I had to wait till this morning to test. It was still a bit damp, icy and misty but I got the footage and I’m really impressed. It takes a bit more work to set up than just clamping a GoPro to the car but the results are worth it. For a £25 microphone, I’m impressed!
She Passed.
It’s all done now. Three weeks without a car though, that sucked.
I did this little investigation into the faults listed on the failure. Filming it was my evidence in case the tester turned around again and failed it. To be honest, I couldn’t find anything he was talking about. The discs weren’t warped, the pads were fine, the shoes were pretty much new, both calipers moved freely and the handbrake activated. I genuinely had no idea where he’d got all these brake faults from.


The “ABS” fault was a little more obvious to me. It’s still to do with the steering rack. Unfortunately it seems when it was installed the rack wasn’t quite in the centre so when it was fitted to a centralised column I was given more distance to the lock on the left than the right. I had a look at disconnecting the column and rotating it to match but it wasn’t going to work, not without shifting the rack back. I did notice where the steering angle sensor was though and it got me thinking…
It’s being triggered because the sensor is still calibrated to the stock setting so when it realises there is more travel in one direction and “straight” isn’t matched with its centre it throws the error. What I thought was if I found the centre position of the steering rack, marked it up and had the garage calibrate the sensor to that setting and then align the suspension to that position too, the sensor wouldn’t trigger the error. The steering wheel would be off centre but everything underneath would be straight. Apparently you can just lift these steering wheels off and adjust according to the Haynes manual so it wouldn’t be hard to straighten up.

That being said, I booked it in today to run this trial. Luckily it turned out an old school friend was working there today and he took my car to look over. I explained everything, he reset the system and the lights went off. He had a look at the brakes too and was just as confused as me so it was retested and passed. Nothing wrong with the brakes at all.
Driving it round to the MOT bay did pop the TRC and VSC lights though but it hadn’t had the alignment so I wasn’t too worried. I did say to align the car with the wheel at the position I marked on the steering wheel but I think it’s been done with the wheel straight so the sensor is still disabling those two things, but no ABS fault which is weird. Oh well, at least I have an MOT now!
What I’m going to try now is having a play with the tracking myself and getting the steering wheel aligned to the mark I made. It might work, it might not, but at the moment I think it’s disabling the TRC and VSC because it thinks it’s always driving at an angle…maybe.

MOT Failure
*sigh* I was hoping it would sneak through.
Knowing the steering angle sensor still hasn’t been corrected I figured there was a 99% chance it would fail but the tester picked up on a couple of other things. The first was a little pedantic in my opinion. The second, slightly puzzling.
The first thing the tester picked on was my indicators. They’re all working, all flashing orange but in his opinion they’re the wrong shade which is apparently a failure. The original bulbs have a painted on orange coating which deteriorates over time and the bulbs had started to peel. That of course meant white light was coming through too but still, a little pedantic in my opinion. It was quickly sorted anywho. The side repeaters were easy, simply pulling out the light unit where as the front indicators needed the bumper removing to get the whole light unit out. They’re all changed now and I also took it as an opportunity to fit some white LED sidelights.


The second reason for failure was my rear brakes. When I got the phone call to say the car had failed I was told the drum brakes for the handbrake were metal on metal. I was confused to say the least. In fact, the list went to both rear brakes binding, nearside rear brake disc warped, metal on metal noise on application of brakes and parking brake has no reverse travel. I explained that I’d changed the shoes in September so I had no idea why there would be a metal on metal grinding… I’ve also not heard the sound myself, ever, so I’m even more confused. I’m going to have to do a bit of investigating to see if something has locked up inside or if the tester is trying to pull a fast one on me.
So now at the moment I have to get around by bike, and with the short winter days I can only do the repairs at the weekend. It’s a bit of a pain in the ass really but I’ll see what’s what when I strip the rear brakes down. As for the steering angle sensor… I think I’ve worked out how to fix that now.

Mysterious failure.
Rewind to last Sunday. I’d washed the car, waxed the lot and was just about to head round to Kyle’s for those photos. I started the car up and out from the engine bay came the horrible screech of a loose belt. *grumble* I was off out though so I told myself I’d tension it later.
That didn’t happen.
I’ve been driving to work for the last few weeks after suffering a bit of a back injury and although that’s got nothing to do with the actual failure, it stopped it from causing any major damage. On Thursday I got to work first, pulled up at the gates only to hear a *tick, tick, tick* coming from the engine bay. Hmm. Gate opened, car parked I popped the bonnet and instantly saw the auxiliary belt was minutes, or seconds away from flying off. It was holding on by one, maybe two ribs so I instantly stopped the engine. How can the belt move that much though? I’ve never had one loosen itself that much before! Honestly, I had no idea how it had managed to work its way loose so I started to thread it back on. Then I noticed the damage. Something had been rubbing it directly down the middle and almost eaten right through the belt. That something could well have been the tensioner… It wasn’t where it was meant to be. Instead it was flopped over on top of the belt.

This is the mysterious failure and the cause of the loose belt. Somehow it had left the centre coller on the shaft it sits on and worked it’s way over the bolt holding the collar in place. Once it had come off, well all tension was gone. It wasn’t just that one failure though as the lower bolt decided to snap. When I was trying to get the top mount relocated the bottom bolt decided to shear off leaving my stranded. I can only guess (as I haven’t played with this part) that the previous owner(s) of the car have replaced the bolt, not put a washer on, which hasn’t locked the top bush in place. While that has been working it’s way loose, it’s put strain on the bottom bolt which eventually snapped.
Great. Well at least it all failed where I have a nice unit to work in.
Looking at it, the bolt that snapped is on a pivoting bracket which is attached to the block via one bolt. That must mean a simple job of removing one bolt, drilling out the old bolt and fitting new bolts and belt right? Wrong.

After work on Friday, with a new belt ready to go on, I set about removing the one bolt on the bracket. There’s no way that bolt was coming out without moving the engine. It’s path to freedom was obstructed by the chassis. This meant I had to mess about removing engine mounts and lifting the engine to free it.

Three bolts holding this mount down on the drivers side.

Strip out the air box and battery to get to the four bolts holding down the mount on the passenger side.

Then crawl underneath and undo the two holding this front mount to the subframe.

And crawl even further under to get to the four bolts holding the rear mount down. (Where I found a gearbox oil seal leaking…)

With that I could lift the engine, bit by bit, jut enough to free the bolt from the chassis. I just hope nothing got crushed in the process. It was a bit of a lift and pray moment. Anyway, that happened this morning. I gave up half way through last night and started again this morning. Fresh eyes and all that.
With the bracket out I could inspect the damage and drill out the old bolt. It wasn’t a smooth break and my original idea was to just run a 8mm drill bit through the hole, clearing out all the old bolt and threads. Before I went ahead with that idea though I gave my Snap On bolt extractor kit a go. It says to drill out a pilot hole and then tap in the reverse thread bit and wind the bolt out. Well. It’s a load of bollocks. The drill bit was utter wank and I had to use works Cobalt bits and then the Snap On “extractor” part completely failed by stripping itself in the process of trying to wind the old bolt out. I just gave up and ran a 8mm bit through the hole. Job done.


Well the bracket still needed to be reattached, engine bolt back in place, accessories refitted and belt fitted but it was the home straight now. That, of course, turned into a nightmare too. Refitting the bracket, mounts, air box and battery were a piece of piss but the belt… The correct way of fitting the belt is with the tensioner in place. You’re meant to wind the belt around as many of the pulleys as you can and then use a soft aluminium, badly shaped nut to act as a mount for the lever you’re going to use to compress the tensioner before sliding on the rest of the belt. Simple.
Well I tried that and ran out of hands. Not only that but the soft nut on the bracket decided it didn’t even like my correctly sized, 6 sided socket and rounded slightly so I had to call for back up. Kyle popped over to offer an extra pair of hands and quite honestly, I wouldn’t have managed it without those hands.
Before he’d arrived I tried fitting the belt another way. Belt on first and tensioner second. Nope. We tried “shocking” it into place (on the top shaft) but everytime we neared success the collar in the bush popped out. We tried clamping the tensioner while it was in the car but there just wasn’t any room. We physically couldn’t apply enough force with our hands to compress the tensioner and trying to be clever and using cable ties to lock the compressed tensioner in place failed. It looked promising but the cable ties kept sliding off.
This went on for quite a while….
I then went back to the original method, slipped the belt off, refitted the tensioner and had another go. We managed to get a bit of grip on that shitty bolt to compress the tensioner slightly but it still seemed to tight to get the belt on. I had a slight brainwave though. Crawling under the car, having Kyle hang onto the lever to keep as much tension off the belt as he could I tried to fit the belt. It wouldn’t go straight on but I did mnagae to slowly grip a small part while rotating the other pulleys slowly. It worked. Bit by bit the belt fell into place until finally it was settled.


I never want to have to do that again. That one belt runs the air conditioning, alternator and water pump. While I can live without air con, and can maybe get away with small trips on no alternator, I need the water pump! They should have just kept it simple like the layout on my Civic. Seperate belts and tensioning done with a big bar and a spanner. Simple.
It’s done now though. New bolts. New belt. No future problems hopefully. It has left scars on my freshly painted rocker cover though…. *grrrr*

EP3 update.
Breaking news: Money does grow on trees! (As proved by Kyle and his latest round of spending)
I joke of course. He works hard for all these new toys and it’s really paying off. The last bit of work I did on the car was fitting the coilovers, but even then I knew at least one new thing was on the way. First came a set of Rota Grids. Some of those deep, wide ones that really give the car a strong stance. Unfortunately they rubbed so the arches were rolled and the car raised slightly but now she’s sitting pretty.
Then came the turbo kit. He’d been talking about it but I didn’t actually realise it was going to happen so soon. The car spent a good amount of time with TDi North having a turbo kit installed, all the tuning done and a few other bits and bobs to help him along the way. An MFactory LSD has been installed to help manage the power. I’ll be honest, the amount of time the car was at TDi for was, for me, too long. It went on for weeks due to one thing or another (being short staffed and not having the parts ordered I believe). However, the end result is pretty damn awesome. The kit looks extremely well put together and any niggle or question that Kyle has found bothering him seems to have been answered fully. The kit, has boosted the EP3’s performance to 360bhp (Correct me if I’m wrong Kyle?) which is “boost by gear” but there is also a special button which can raise the power output to 400bhp. A tidy figure!
I actually thought he was done spending there, but this week the car has been away once more. It’s spent a week at Knight Racer Ltd, having a Mugen grill and front lip / splitter fitted. The lip has even been smoothed, or sealed into the bumper so you can’t see any join between the two parts. Paint match is 95% but the quality looks spot on.
As far as I know, that’s the lot for now, so today I grabbed some photos.


No videos just yet, I need to get the lift bolt changed in my Corolla before I go chasing after a boosted EP3. In a couple of weeks we’ll see how it fairs on the quarter mile strip too.
Oh, and here’s one shot of the ‘rolla.


eBay bargain.
As always, I keep an eye out for bargains on eBay. Things that I’m planning for further down the line. If they come up cheap enough, a last second snipe is all it takes and I’ll find the money. This time round a bucket seat.
There’s obviously the benefit of weight reduction when fitting a fibreglass bucket seat over OEM seats, as well as the body holding form for any spirited drive but I have to say, I find them comfier than standard seats. I don’t find the standard leather Corolla seats really that comfy. They have a large lower back support which forces my body into a shape it doesn’t really like to sit in, and my shoulders are rarely resting on the back. Comparing it to the minimal padding, body hugging BuddyClub seat I had in the Civic, well, I loved that seat. I could drive for hours and because it held me all the time I was never uncomfortable.


For the grand sum of £33 I’ve managed to bag myself a Cobra Imola 2 fixed back bucket seat. It was dirty as hell when I got it, covered in dust, dirt and years of grime, but amazingly, it doesn’t have any tears. There’s a few tiny holes (possibly fag ash burns?) in the seat cushion but they’re barely 1mm in diameter. I’ve stripped it all down tonight, chucked the covers in the washing machine and they’ve come out brilliantly. A little faded but for a seat that was produced in 1997, I can live with that.

When it comes to weight, even with the custom side mounts it has, the seat weighed in at 6.2KG. I’m expecting the standard seat to be around 18KG so even after I get some rails made I think I’ll have around a 10KG saving. Now all I’ve got to do is find a similar seat for the passenger side and replicate the weight saving. Well, that and make some rails and find some harnesses.


I can’t be doing with seatbelts… they’ll scuff up the material!

Crystal clear.
I’m genuinely amazed at the difference this has made. Since owning the Corolla I’ve been putting off replacing the drivers headlight purely because I filed it under a cosmetic repair and that wasn’t as important to me. Lately though, I’ve been getting more and more annoyed at how quickly the yellowing and fogging reappears after a good polish, especially when the opposite side is “good”. The drivers side (headlight at least) has obviously had a knock at some point too as two of the three mounting points are broken.


I’ve had a look around this week at various lights on eBay. There’s obviously used units but I wasn’t convinced at how good the “excellent condition” ones were and looking at the cheaper replica ones, well, I’m never convinced on the quality. The only other option that eBay threw at me was a Valeo unit, which happens to be the exact brand that Toyota use. Those units cost about £130 each but luckily I came across one seller who had listed brand new, genuine Valeo units at around £70 delivered. Yesterday I bought one on a whim and today, it arrived.
The quickest delivery EVER.
It was pretty simple to swap the unit over. Four bolts / screws remove the radiator cooling panel, another four and the grill and bumper can be pulled out just enough to gain access to the lower headlight bolt. This was actually the only one holding my light in… the upper two mounts had snapped, and one was missing completely. The headlight then just slides out, you disconnect two plugs and it’s free. Swap over the bulbs and a couple of covers and the new unit slips back into place. Perfect.
It looks SO much better. Almost too much. The “good” passenger side now looks dirty compared to this side but I can’t do anything about that without taking the light apart and cleaning the chrome inside. Anyway, it looks awesome now. Crystal clear headlights. Perfect.

Now if only I had the money to respray the entire car so the paintwork matched…

Waxing Timelapse & New Buy
Over the weekend I was busy “dog sitting” so I couldn’t really get anything big done. In fact, the only thing I could really do is give the old girl a good wash, polish and wax. In all honesty, she’s a 10 yard car. Looks great from a few paces away but as soon as you get close you see all the scratches, touch ups, mismatched paint, stone chips, cracks, and dents that previous owners have left. Still, from those 10 yards away, with a good polish and wax, she looks amazing.
I decided to take all my polishes and wax with me, set up my GoPro and film the whole thing. It took a good few hours but it’s been condensed down into a 4 minute time lapse. Unfortunately, again, YouTube has decided to block the video from mobile playback and some countries (I don’t know which) because of my choice of song. I tried to pick an instrumental to avoid this happening but I guess they’re that picky.
AutoGlym products are my weapons of choice (apart from the Turtle Wax soap):
Turtle Wax Soap
Autoglym Deep Shine Polish
Autogylm Fast Glass
Autoglym Vinyl and Rubber Care
Autoglym Instant Tyre Dressing
Autoglym Leather Balm
Autoglym Aqua Wax
Here’s the results:


If only the paintwork was just as good looking up close!
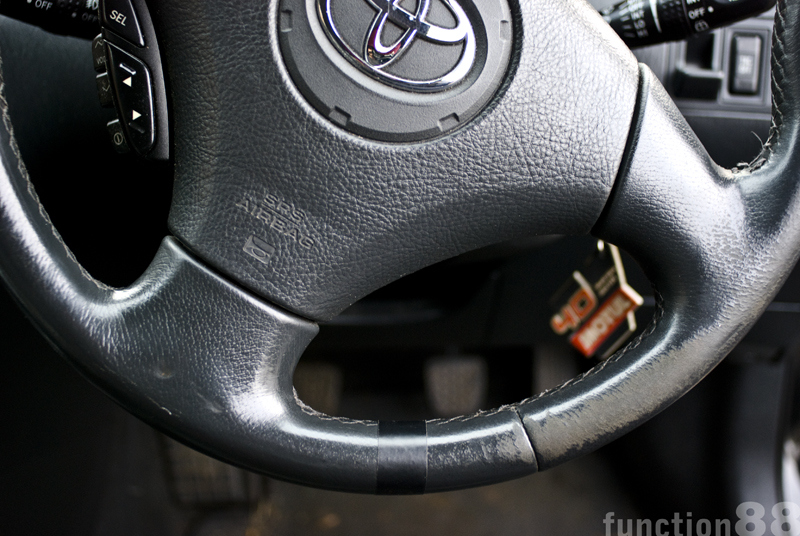
My replacement gear knob turned up today too. After the listing on BuddyClub UK for a Toyota was wrong and the incorrect knob returned I received the Subaru fitment today. In case you missed it in my last post, the listing on the website for Toyota is for a M8 threaded gear knob. As far as I can tell this only fits automatics. The Corolla needs an M12 gear knob and the only one that matched (after deciphering the part codes) was the Subaru one. It fits perfect.
The standard one was well worn, so this is more of a visual upgrade. Ideally I was looking for something heavy to help with shifting but the BuddyClub Type B actually seems lighter than OEM. I’ll have to see how I get on with it, whether the comfort and “feel” are improved or not. For now at least, it looks better (it actually has the blue BuddyClub logo stuck on top now… I just forgot to take a photo).


A bit of bronze.
The bolt extraction kit turned up the other day! I had it sent to work so I didn’t miss the delivery and after I got chance to give it a go. The plan was, according to the kit, to drill out a pilot hole with one of the supplied Cobalt drill bits and then screw in the reverse thread extractor to wind out the broken half. I’d borrowed the 18V Makita from work to get a bit more power but unfortunately it doesn’t seem to be powerful enough. There’s not much to drill but neither drilling slowly, or quickly really made an indent in the bolt. I tried and tried but I wasn’t making any progress so for now I’ve reassembled the rocker cover and I’m driving around at a sensible speed until I can sneak in some time after work and use the power drill and our own cobalt bits.
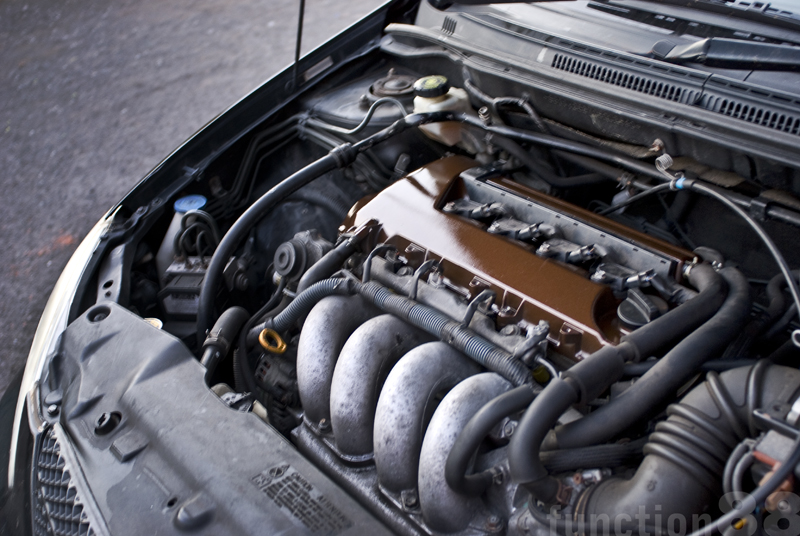
That being said, I did get the rocker cover finished. The black was a bit boring for me so I dug out a can of Ford “Roman Bronze” I had lying around and used that to add some colour. It’s meant to be slightly metallic so I followed that up with a couple of coats of lacquer to bring out the shine but also to add some protection. A couple of heat cycles later and it’s coping with the heat just fine.
Apologies about the mucky trim, I’m going to give the bay, and the whole car a good clean tomorrow.


