Tagged: Rebuilt
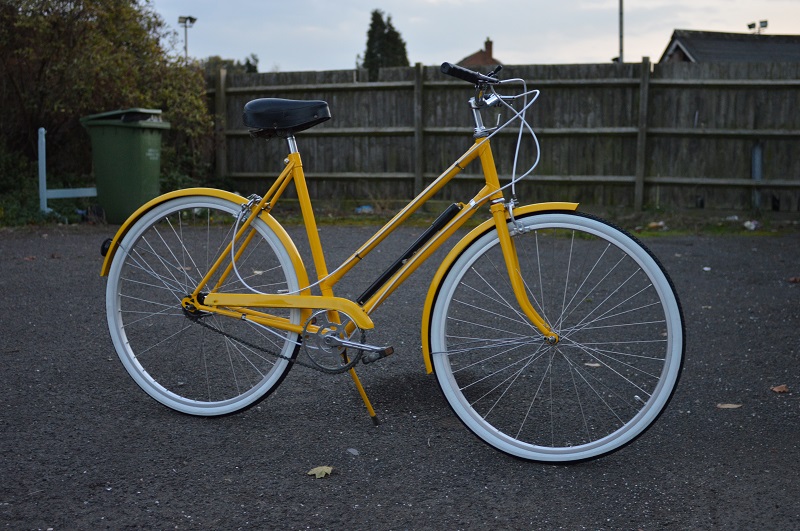
Viscount “President International” – Finished
She is a beauty!

I’m over the moon with how this build has turned out. My only criticisms are the lack of chrome rims and the lack of decals. The first was a genuine mistake when ordering new rims (and a semi misleading picture) and the second is purely down to nobody produces the exact Viscount decals. I have found some, but when I ask a question and the seller ignores me I don’t find that too promising for a potential sale.
Anyway, the finishing touches. Starting with the wheels I replaced the old rusted spokes and the badly painted rusted rims with a brand new set of alloy rims and stainless spokes. I’ve built the wheels myself and trued them to the best of my ability with my jig. They seem straight and true, and the white wall tyres finish the bike off perfectly. Building the wheels wasn’t actually too hard. I’ve built one wheel before and this time the whole process seemed ten times easier. I feel like I could lace another set from memory any time now.
After using white wall tyres I had to use white cables; clean and crisp. They’re held down with a series of brand new cable clamps which the bike lacked in its original state. The Sturmey Archer hub has taken a bit of tweaking to find that sweet spot for “2nd” gear but I think we’re there now. I took her out for a quick test ride and all seemed well.
I’d love to get £250 back for the bike and maybe make a small profit; we’ll see. A lot of money and time has gone into this build but I’ve tried to focus on quality. It’s lasted 40 years already, I’m sure it will last another 40! (My Carrera Vulcan cost more and barely made 2 years without a complete rebuild!)
What do you make of the finished bike?


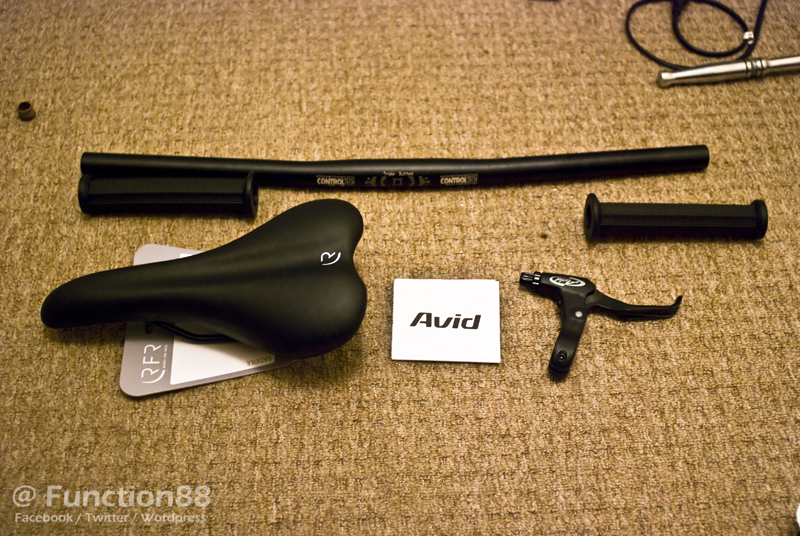
Taking shape now.
A new bunch of goodies arrived in the post on Friday so a bit more of the “Project 80’s” Fixie has been assembled.
Originally the bike had the typical narrow drop bars but I didn’t fancy those on this new build. I wanted to be able to cruise around comfortably so I opted for some simple flat bars. Of course that meant I couldn’t re-use the original brake levers, not that I wanted to anyway. The amount of play they had was ridiculous so I opted for a low price Avid brake lever that I’ve fitted with a new cable from a Shimano set I had lying around. Not wanting to spend too much I have re-used the original brake “caliper?” but with the new lever and cable it seems to be working really well. I went for the low cost option with the grips too, just buying some simple slide on grips but they were an absolute pain to fit. It took ages to move them up the handlebar millimetre by millimetre into position that I wish I’d just spent a bit more and bought some lock on grips.


When I bought the bike it didn’t come with a seat or seat post so both of those were needed. As I started the project I’d actually picked up a new seat post from Halfords but it turned out to be a fraction of a millimetre too big even after cleaning up the inside of the tube. I was on the lookout for a smaller one but 25mm and below must be super rare. My boss actually came to my rescue though with a suggestion of cutting a slit down the seat post so that it compresses slightly when installed. I’ve got to give it to him, it worked a treat. I cut a slit front and back and the seat post slid into the tube (although it still is pretty tight). With the new seat fitted I’ve managed to get it roughly where I need it and finished it off with a silver quick release clamp.

The last bit for this update involves the cranks. One pedal was well and truly seized into its thread and not even a soaking in PlusGas would shift it. It actually took a length of scaffolding hooked over my spanner to eventually crack the seal the rust had formed. A lot of effort just to remove a pedal! Once that was off I set about trimming down the chain rings. I’m only going to use the lower chain ring on the bike (which is around 40 teeth) so that’s made the large chain ring a bit pointless. I decided that I’d either trim all of the teeth off and turn it into a chain guard or completely cut off the outer ring. The decision was made for me when it took longer that I though to just cut off a couple of teeth. It would have taken many a battery charge and a few cutting discs to remove all the teeth so I concentrated on cutting the fiver points that held the large chain ring in place. The Dremel just about made it so I’ve just got to tidy up the “stumps” and get the it all powder coated black before fitting.


Hopefully all being well the bike should be hitting the roads soon!
